Open AI Codex
3 min read
How to Install and Use OpenAI Codex in VS Code
1. Prerequisites
-
Visual Studio Code (latest version) installed.
-
A valid ChatGPT subscription: Plus, Pro, Team, Edu, or Enterprise. Codex is included in these plans. Get VS Code
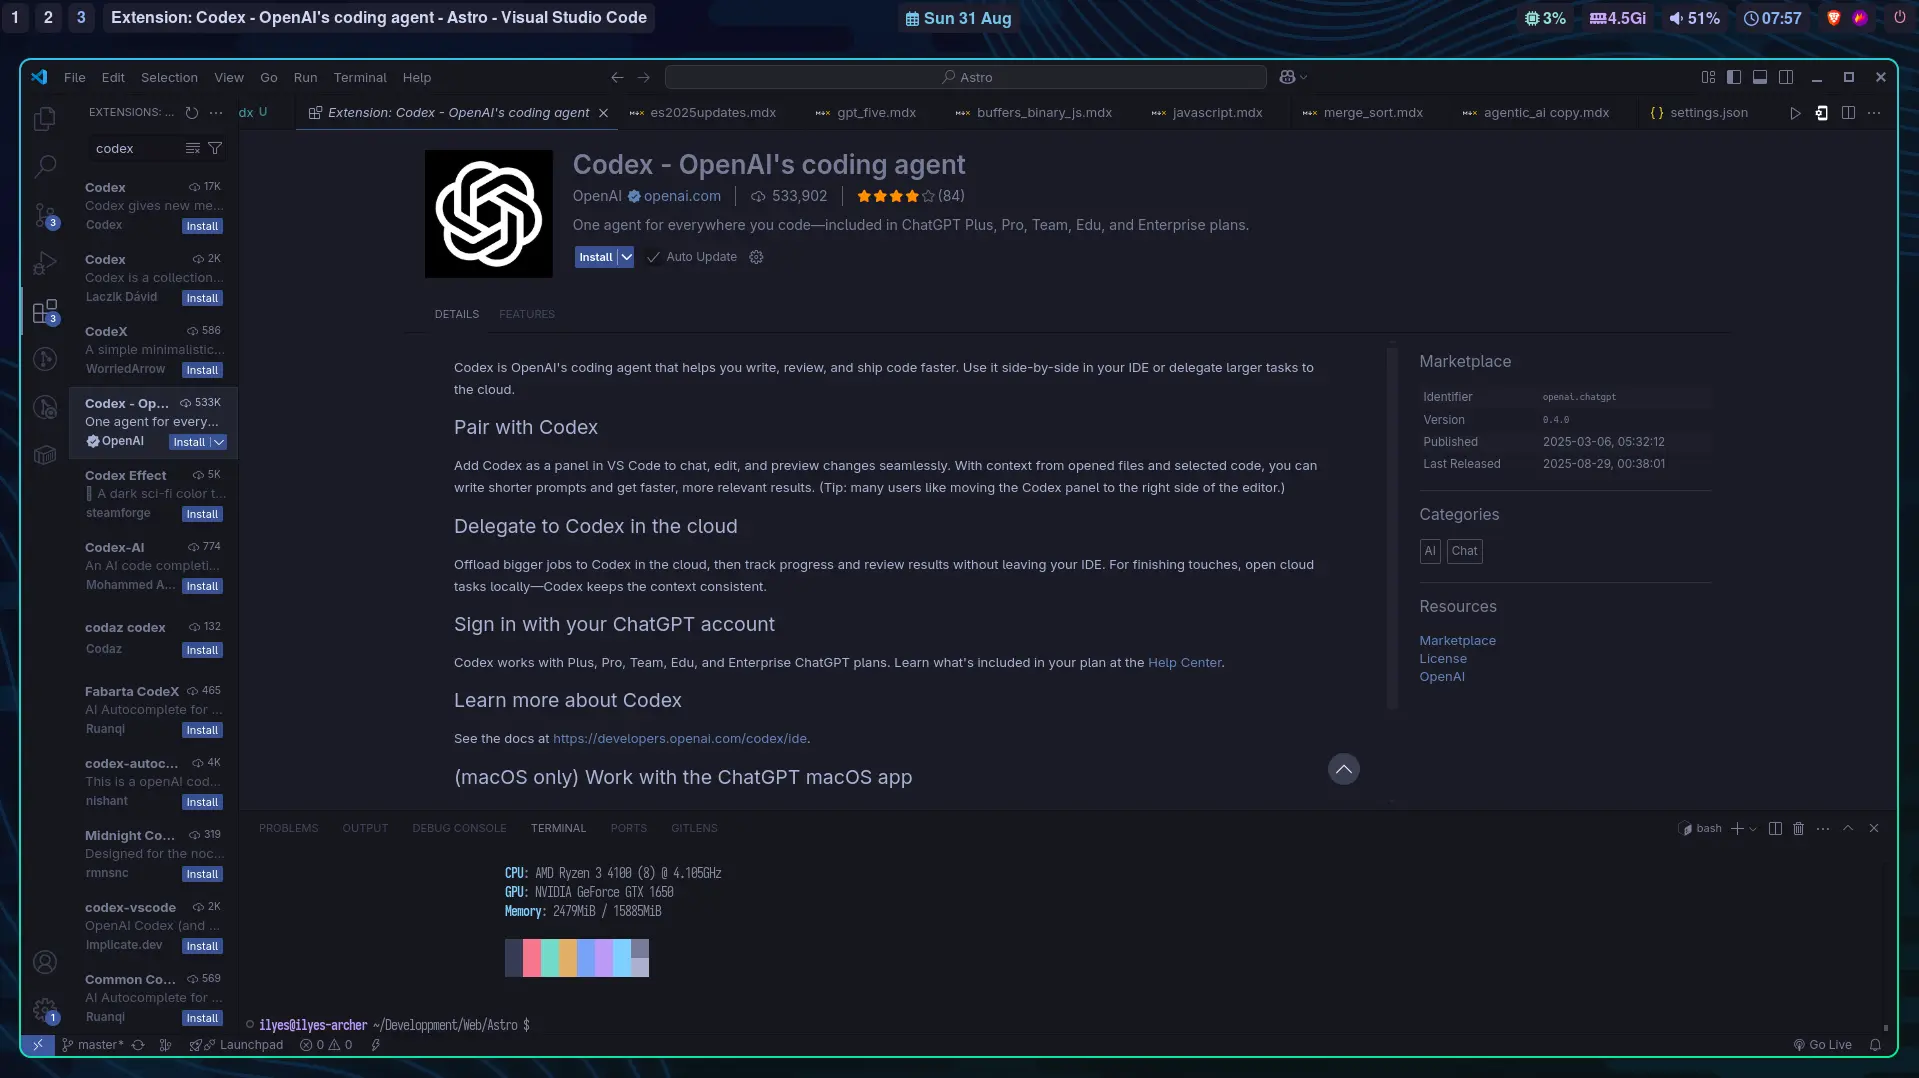
2. Install the Codex Extension
-
Open VS Code.
-
Go to Extensions (left sidebar).
-
Search for “Codex – OpenAI’s coding agent” published by OpenAI.
-
Click Install and trust the publisher.
Alternatively, use Quick Open:
- Press Ctrl+P, paste:
ext install openai.chatgptthen press Enter.
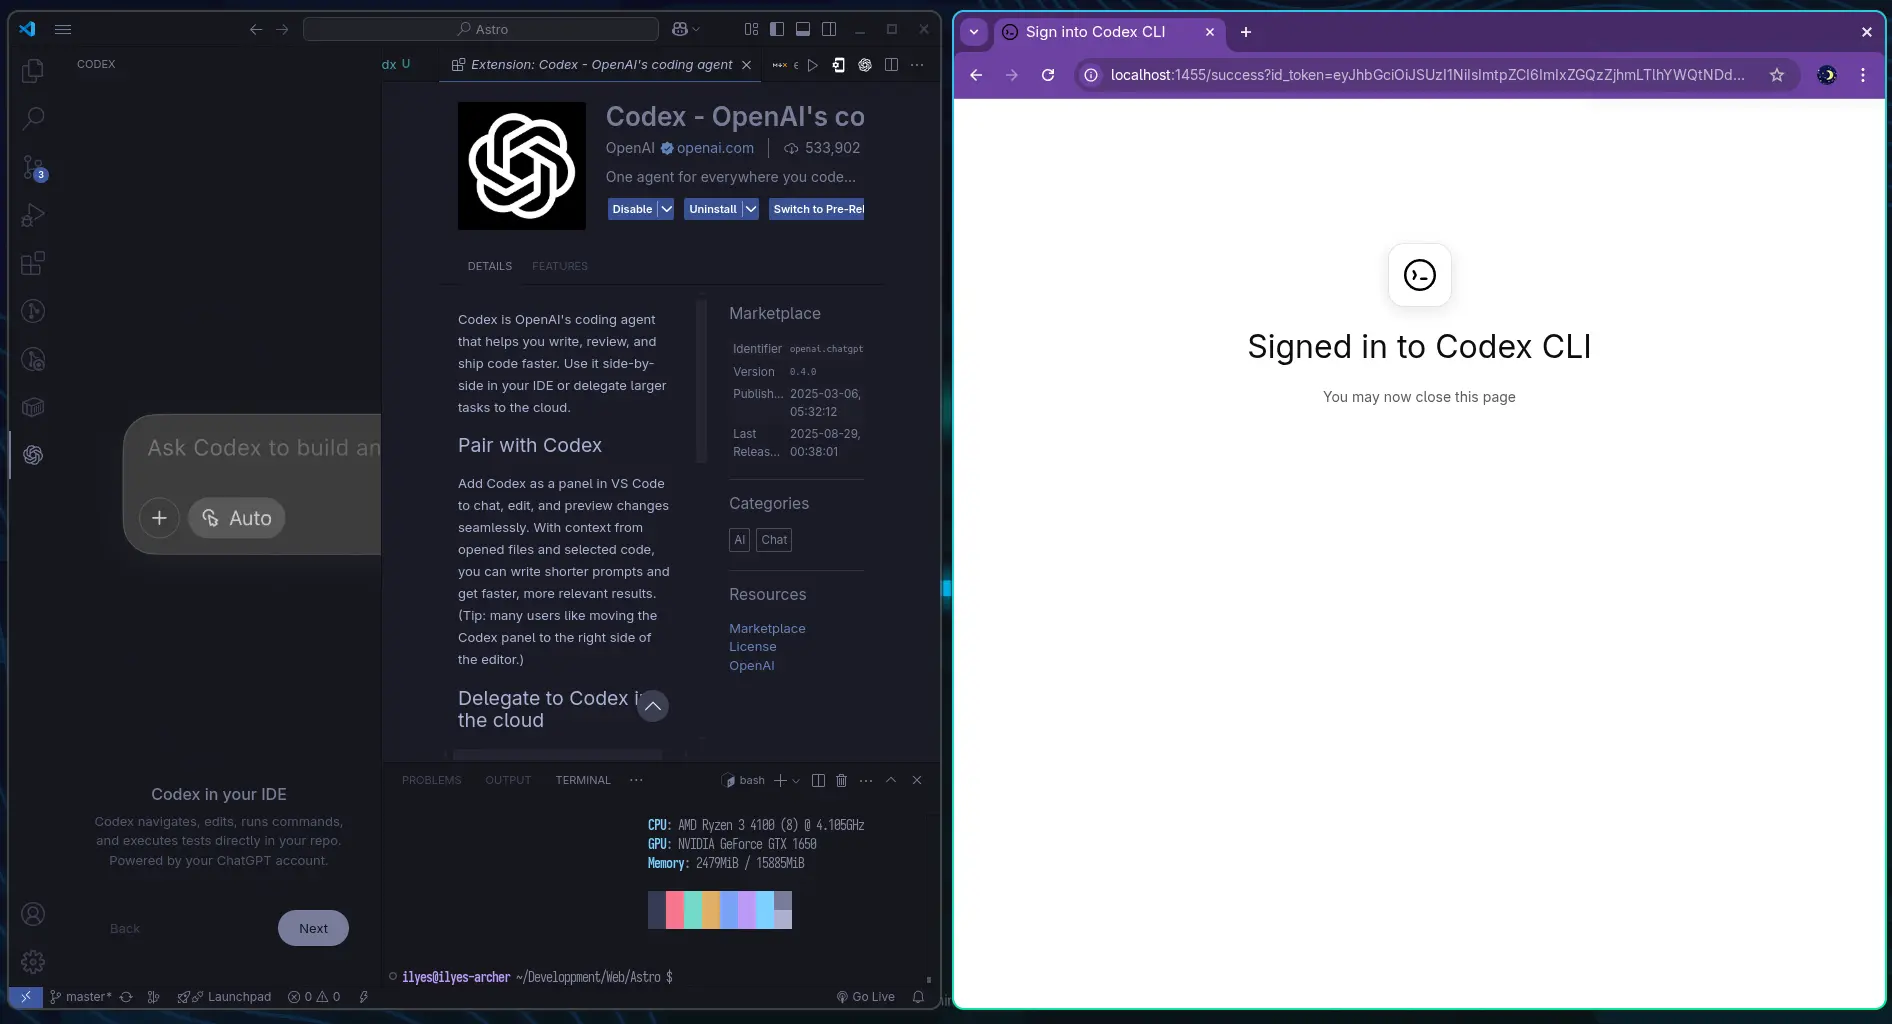
3. Authenticate

-
After installing, you’ll see a Codex icon in your Activity Bar.
-
Click it and press Sign in with ChatGPT.
-
Your browser will open—log in to your OpenAI account.
-
Once authenticated, the Codex sidebar is active.
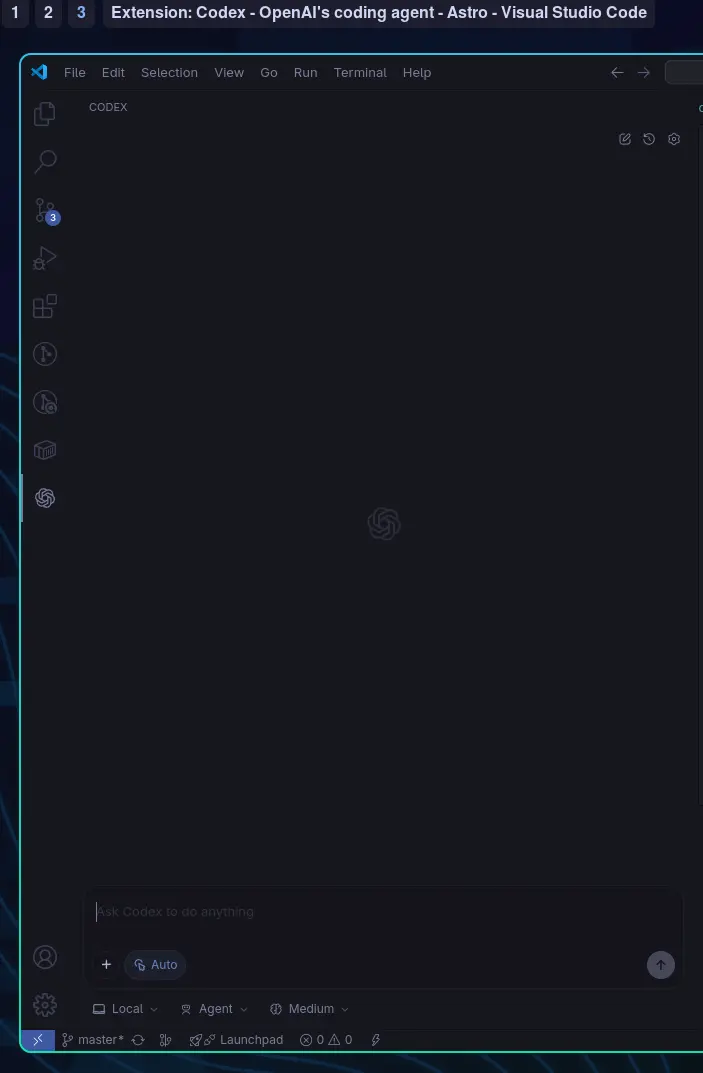
4. Understand the Interface
The Codex panel offers:
- Environment mode:
— Work locally: Codex reads and edits files on your machine.
— Run in the cloud: Codex runs tasks in the cloud. open ai developers
- Interaction Mode:
— Chat: For casual conversation and planning.
— Agent: Reads, edits, and runs local commands with your permission.
— Agent (Full Access): Same as Agent, but without asking for permission for each action—use with caution.
- Additional controls: New Chat, Task History, Settings.
5. Try Your First Prompt
-
Open a project folder via File > Open Folder.
-
In the Codex sidebar, type a clear prompt, e.g.: “Create a simple to-do app with login, password, DB, and Bootstrap UI.”
-
Hit Send.
-
Codex outlines its plan, creates files, and writes code in real-time.
6. Run the Generated App
-
Open the integrated terminal with View > Terminal.
-
Run the provided command (e.g., python3 app.py).
-
Check your browser at http://127.0.0.1:8000 (example) to interact with your new app.
7. Bonus—Cloud Tasks & Context
-
You can delegate complex tasks to Codex in the cloud.
-
Codex manages workflow—preview changes, apply locally later without losing context. open ai developers
You just tapped into an AI-powered pair programmer—no fluff, just action. Prompt clearly, guide smartly, and let Codex handle the grunt work.
Rock on.
More Articles
Key Words:
Agentic AIAi AgentsAgents vibe codingcodex